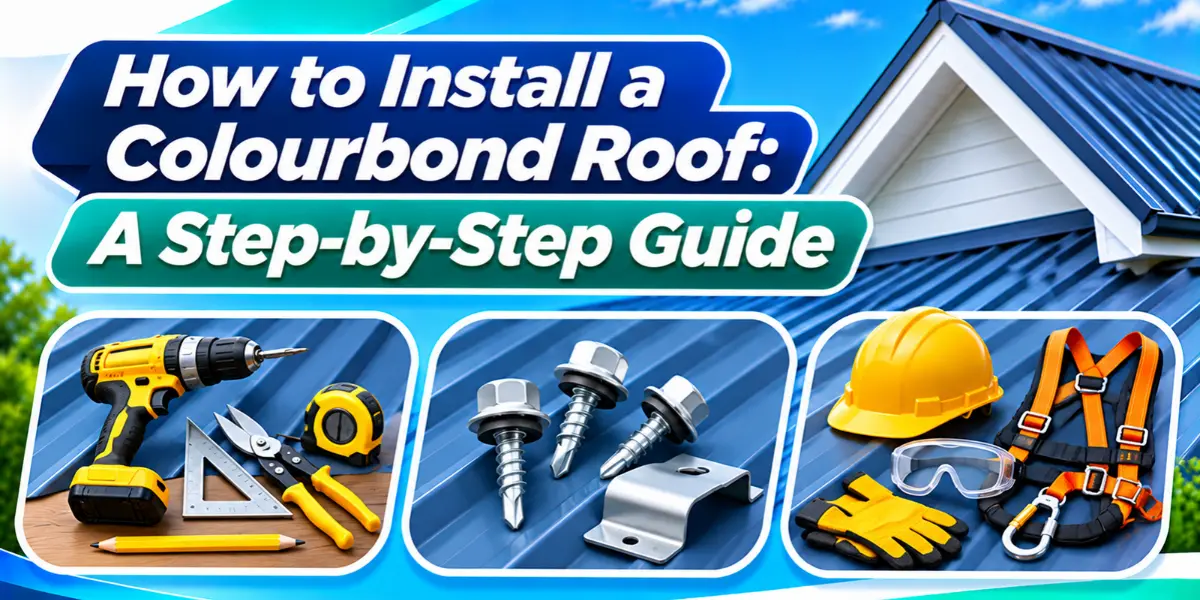
How to Install a Colourbond Roof: A Step-by-Step Guide (Tools, Fixings and Safety)
Colourbond Roof Installation Process: The process of installing a Colourbond roof is well defined. First you need to assess the condition of your existing roof structure. Second, if necessary you will install battens and/or sarking.
Third, you will place the Colourbond sheet panels in the proper sequence. Fourth, you will attach the panels to the battens using appropriate fasteners. Finally, you will complete the installation of flashings, ridge and hip capping. If you follow each step as specified by the manufacturer then you will have a long lasting, weatherproof roof that looks great.
The entire installation process – from preparation through to final inspection – along with all required equipment, quantities of materials, profiles and fixing options, safety procedures, common errors made, costs and time frames involved in installing Colorbond® roofing are included within this manual.
Roof work can involve serious falls and electrical hazards. How long it takes to install depends upon how large the roof is, its pitch (angle), how complex it is, what kind of weather you have, and the level of experience your team has. You can use this guide as a resource to help you understand the process of installing a roof and how to prepare for your next roofing project. This is not meant to take the place of the manufacturer’s installation manual or a professional..
Quick Summary: Colourbond Roof Installation Steps
- Inspect the roof structure by examining the rafters, trusses, and support elements for signs of damage or misalignment.
- Install sarking, insulation and battens: in accordance with building design and regulatory requirements.
- Lay out the plan of the sheets by measuring precisely and taking into account the direction of the drainage, as well as the prevailing weather.
- Place and secure each sheet: apply the manufacturer recommended fasteners, in the correct locations, at the prescribed distances.
- Fit the flashing and cap on: protecting your roof from leaking at the ridgeline, hip lines, gables and where the wall meets the roof.
- Inspect and clean up – inspect for laps, fasteners and drainage, and then remove any metal swarf.
Before You Start: Can You Install a Colourbond Roof Yourself?
In certain situations, yes; however, DIY roofing may not be appropriate for all homes and homeowners. To perform a complete roof replacement, you will need to have knowledge of roofing installation, the correct tools, appropriate fall protection equipment, and a good understanding of Australian Building Regulations.
Performing a complete roof replacement will involve working at heights, handling large sheets of material, verifying structural integrity, and ensuring that the water-tight seal is correctly installed. Therefore, a licensed professional would typically provide a safer option when replacing a complex residential roof.
DIY vs Professional Installation
| Factor | DIY | Professional |
|---|---|---|
| Skill level | Needs practical roofing, cutting and fastening skills | Experienced roofing contractors |
| Time | Usually longer | Generally faster |
| Safety risk | Higher without training and fall protection | Managed through professional procedures |
| Quality | Depends on the homeowner's experience | More consistent |
| Equipment | Must be bought or hired | Usually supplied |
| Cost | Lower labour, but equipment and mistakes add expense | Higher upfront labour cost |
Some owner-builders doing straightforward DIY can meet BCA requirements and safety controls. Professional tradespeople are required for full replacements, more complicated designs, and structural changes.
One important note: a COLORBOND® product warranty and workmanship warranty by the contractor are two separate things. BlueScope product warranties are dependent on the installer’s eligibility and compliance to installation requirements and maintenance. So, check the terms and conditions prior to choosing a contractor or going the DIY route.
Building Permits and Local Council Rules
Check to see if you will need a building permit, planning approval or other council approval for your project. Requirements differ according to the state, area, and type of work being done.
Replace your roof material – from tiles to Colourbond steel – and you may need to apply for a building permit. As an example, the City of Monash in Victoria has listed a tile-to-Colourbond roof conversion as a type of permit-required construction activity in certain situations.
Like-for-like replacement:The minor works that use the same materials as the existing works can possibly be exempt from being classified as “like-for-like.”
Heritage properties: overlays may require extra planning permission.
Structural changes;The addition of structural changes such as a change to the frame, truss or roof line will likely require an engineer’s review and approval.
Contact your city’s government, verify that the project will require any permits or licenses, obtain engineering assistance if the original design of the frame requires modifications, and read both the National Construction Code (NCC) and the manufacturer’s directions.
Do not assume that replacing a component means that the new component is exempt from needing a permit simply because you are using the same structure.
When Should You Hire a Professional Roofer?

- Steep roof pitch: A steeper roof can increase the chances of you falling off of it. Additionally, if you have to use large pieces of material (such as metal), it may be difficult to handle them.
- Double-storey buildings:When working on double-story structures, moving materials up and down as well as getting to the outer edges of the roof will require specialized equipment.
- Existing asbestos roofing:Existing asbestos roofing: Always hire a professional assessor and removal expert when you have existing asbestos roofing.
- Structural damage:If there are damaged rafters, weak trusses, sagging or rot in your structure, you may need to have a professional inspect the situation (possibly by a structural engineer) before proceeding with repairs.
- Complex designs:The use of multiple valleys and hips, skylights, solar panels, and complex junctions required precise measurement and flashing.
- Electrical hazards:Precautions when working near electrical hazards such as overhead power lines and solar installations must be taken care of by qualified professionals.
Falls, electrical shock, fragile roofing materials and being struck by falling objects are identified by Safe Work Australia as some of the most significant risks associated with working on a roof.
Tools and Materials Checklist
Using the appropriate equipment on time will improve accuracy and decrease waste and delays. Additionally, make sure to select products that are compatible with the manufacturer’s specifications.
Essential Tools
- Tin snips, electric nibbler and metal shears for cutting
- Cordless drill or screw gun for roofing screws
- You will need a chalk line, tape measure, roofing square and spirit level to make marks on your work area and align your materials.
- Ladder, roof access equipment and a fall-protection harness
Important Note: Do not use abrasive cutting discs unless the manufacturer has given permission to do so. Abrasive cutting discs can damage the sheet coating and create hot metal particles which will lead to early corrosion. Only use cold-cutting tools that have been approved.
Materials
- Colourbond sheets: check profile, colour, thickness and length.
- Roofing screws: check coating, washer and fastener type.
- Check to see if the profile of flashings, ridge caps and barge caps is compatible with the angle (pitch) of your roof.
- Sarking and insulation: check type, rating and ventilation design.
- Battens or purlins: check material, spacing and load capacity.
- Gutters and downpipes: check capacity against the roof drainage design.
Use of non-compatible materials or fasteners that are not suitable for the selected profile will increase the potential for corrosion. It is therefore recommended to only utilize those items suggested for the specific profile being used.
How Much Colourbond Roofing Do You Need?
Step 1: Roof area. To calculate the area of a simple rectangular roof, multiply the length of the roof by its slope length (from ridge to eave). If you have a gable-style roof, you will need to double this amount. For example, a gable-style roof that has a length of 10 meters and a slope of 5 meters would be 2 x (10 x 5) = 100 square meters.
Step 2 : The next step is to find out how many sheets are needed. To do this, divide the roof’s width by the profile’s effective cover width (not total width), as the cover width includes the side lap.
If you have a corrugated profile with a cover width of 762 mm and a 10 m run, then you will need 10/0.762 = 13.12, which would round up to 14 sheets on each side of the roof (or 28 if there is no specialized end detailing). Also, make sure to measure sheet length up the slope, including the overhang at the eave, and verify the cover width with the product specification.
Step 3: Wastage. These are planning allowances, not manufacturer requirements:
| Roof design | Allowance |
|---|---|
| Simple rectangular roof | 5% |
| Standard gable roof | 5-7% |
| Hips and valleys | 7-10% |
| Many penetrations or irregular sections | Project-specific |
On a 100 m² roof with a 10% allowance, your estimate is 110 m² Output.
Step 4: Other Measurements. Measure the ridge length to determine the amount of capping required. Measure the edge of each gable to determine the amount of barge flashing needed. Measure the roof-to-wall junctions to determine the amount of apron flashing required.
Use the same area calculation method as in Step 3 to find out how much sarking and insulation you will need (including overlap) and how many battens you will need based upon the approved spacing. Never use a “one screw per sheet” rule as the number of fasteners depends on several factors such as the profile used, the support system used, where the roof is located, what wind classification the roof has, and what the manufacturer specifies for fixing.
Pro Tip: Prior to purchasing materials, request from either the supplier or the installer a comprehensive cutting and material schedule.
Choose the Right Colourbond Profile and Fixing Type
- The profile selected will determine how the product looks, what the lowest possible pitch is, how much water can flow through it, the way it is attached to the building structure, and whether or not it is suitable for your structural application.
Three of the most commonly used profiles manufactured by LYSAGHT® (a BlueScope Company) include:
- Corrugated (CUSTOM ORB®) – this is a traditional wave design which fits well with older and/or traditional styled homes, sheds and verandahs. This product has pierced fixing. The minimum slope allowed for installation of this product is 5 degrees.
Please note that “CUSTOM ORB®” is the brand name of the corrugated product, it is not an entirely different type of corrugated product.
- TRIMDEK®: A trapezoidal ribbed profile with a modern aesthetic that is well-suited for use on modern residences, patios and commercial buildings. This product has pierce fix installation. The minimum required pitch is 2°.
- KLIP-LOK®: A hidden-fixing method that uses concealed clips, and has no visible screws, making it ideal for low pitched roofs and architecturally designed roofs.
Pierced-Fix vs Concealed-Fix
- The pierced-fix system employs screws to go through the sheet and includes sealing washers so it can withstand water.
- Concealed fixed system attaches sheets to clips on the back side of the sheets, which provides a cleaner appearance and for certain types of concealed fixed systems, provides for controlled thermal movement that can be beneficial when installing large areas.
For pierced fixed work, follow the steps listed below. For concealed fixed work, add the clip placement: attach the initial clips as specified by the manufacturer’s layout, attach the first sheet, attach the remaining clips at each support point, and finally, attach each subsequent sheet to the previously attached sheet.
Minimum Roof Pitch
At the lowest point on the profile (minimum pitch) water may not flow correctly off the roof and could accumulate where two sections meet (at the lap/joint) which increases the likelihood of leaks. Refer to the published LYSAGHT® specifications:
| Profile | Base metal thickness | Minimum pitch |
|---|---|---|
| CUSTOM ORB® | 0.42 / 0.48 mm | 5° |
| TRIMDEK® HI-TEN | 0.42 / 0.48 mm | 2° |
| KLIP-LOK® 406 | 0.42 mm | 2° |
| KLIP-LOK® 406 | 0.48 / 0.60 mm | 1° |
| KLIP-LOK 700 HI-STRENGTH® | 0.42 mm | 2° |
| KLIP-LOK 700 HI-STRENGTH® | 0.48 / 0.60 mm | 1° |
Check your current installation instructions to verify. The size of the roof, overlap at the ends of the panels, and how much rain falls on the roof are all factors that should be taken into account when determining if a panel can be used. Minimum pitch is not an acceptable alternative to structural designs, wind load calculations or building codes.
Safety First: Working on a Metal Roof
Metal roofs cause falls, have sharp edges, pose an electric risk, are susceptible to strong winds, and can reach extreme temperatures. Sheets of metal are slippery when they get wet and extremely hot when exposed to the direct rays of the sun.
Fall Protection: Use of Edge Protection, Guardrails, or Scaffolding, when possible, and a correctly worn harness attached to an appropriate anchor point, when not possible. A harness alone does not provide sufficient safety for working on roofs. You must also have appropriate anchor points, sufficient fall clearance, and a rescue plan.
Access: check and make sure ladders are safe, stay away from skylights and weak areas, and store your leads and tools in an orderly fashion.
The Personal Protective Equipment (PPE) that you should be wearing includes: cut resistant gloves; safety glasses; long-sleeved shirt; slip-resistant footwear; hearing protection; and sun protection. Please do not rub your hands against any cutting edge.
Weather: never attempt to work on wet sheets; stop working if there is a strong wind (large sheets function as sails) or if a thunderstorm occurs.
Heat: Do your hardest jobs during the cooler times of day; drink plenty of water; take rest periods out of the sun; look out for signs of feeling dizzy, sick to your stomach, or confused. Heatstroke is a life-threatening situation.
Prior to beginning work, verify that your assessment of the area for access has been completed, that you have conducted a pre-work inspection of fall protection devices, that all of your materials are properly secured, that you have evaluated the area for potential electrical hazards and that you have established procedures for rescuing someone who may fall. Always prioritize safety above the speed at which you complete the task.
Colourbond Roof Installation: Step by Step
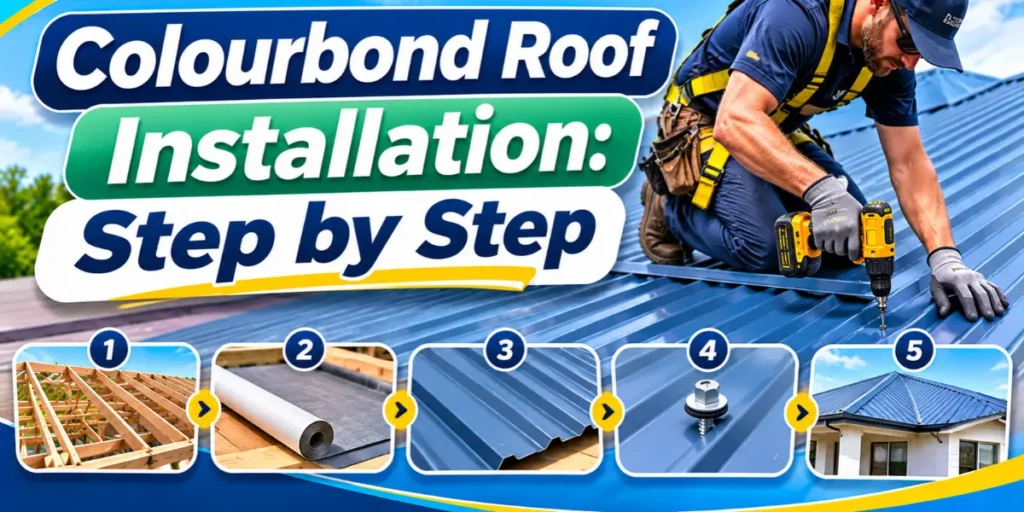
The 11 steps outlined below represent a typical order of events in accordance with Australian roofing practices and LYSAGHT® technical literature. These steps serve as a general guide only, and should not be used in lieu of engineered specifications or the manufacturer’s installation manual.
Step 1: Inspect the Roof Structure
Look over all trusses for possible cracks, movement, and corrosion. Check each rafter for rot, insect damage, and bending. Inspect the condition, alignment, and spacing of batten and purlin systems. Determine if the roof plane is level.
When inspecting the roof, if you notice sagging or weak areas in the structural components, consult with a professional structural engineer prior to proceeding. Metal roofing materials cannot replace or repair a damaged structure.
Step 2: Install Roof Sarking and Insulation
Sarking can be either a flexible membrane or a reflective foil which will help control condensation, and protect against wind-blown moisture. If used with appropriate insulation, sarking can reduce unneeded heat flow. Select the sarking product(s) which meet your building requirements,
then install the product(s) in the direction recommended by the manufacturer, overlapping the product(s) as indicated, being careful not to tear the membrane, and maintain clearance and ventilation around penetrations.
Because there are many factors including how the building was constructed, what climate zone it is located in, and the level of condensation risk, you should never assume that all reflective foils are installed identically.
Step 3: Fit Battens at the Correct Spacing
The distance between battens/purlins is determined by how far apart they are from each other, which also influences the strength of the structure and the amount of wind it can withstand. No one set of dimensions applies to all types of Colourbond roofs.
To determine the correct batten/purlin distance for your specific roof, you must first identify the type of roof (profile), the thickness of the sheets used in the roof, the slope of the roof, the wind classification of the area in which the building is located, and the method of attachment.
Once you have identified these factors, you will then be able to reference the profile-specific LYSAGHT® design and installation manual to determine the appropriate batten/purlin spacing.
Step 4: Install Fascia and Gutters
Work on the coordination of the fascia and gutter work with the sheeting sequence. Usually, after completing the fascia, establish the gutter line and fall, install the bracket and gutter systems, verify where the outlets are located, and align the sheet overhang with the type of gutter being used.
When you install gutters prior to sheeting, it allows the team to position the sheets at the edge of the roof in the proper location. However, other methods exist that require a different installation order.
Therefore, refer to the manufacturer’s directions for the installation process of your specific gutter system. Never estimate how much of an overhang is necessary; if you make an error in estimating the overhang, it will cause water to bypass the gutter system or flow behind the fascia.
Step 5: Plan the Sheet Layout and Starting Point
Measure length, width, slope, and sheet length; determine the starting edge; and create reference lines using a chalk line or string line. LYSAGHT® suggests beginning at the far end of the building (the side away from the worst or most common weather conditions) and installing sheets towards those weather conditions, to help prevent rain from being blown into the seams between sheets.
Ensure the correct direction of overlap on each subsequent sheet; ensure that the first sheet is installed perpendicularly to the eaves prior to attachment. All subsequent sheets will follow suit, therefore errors made on the first sheet will be carried through the entire roof installation.
Step 6: Lay the First Sheet
Place the first sheet at the beginning edge of the roof; verify that the sheet is properly aligned with either the fascia, barge, or end wall, that the sheet is correctly positioned at both the ridge and gutter ends, that there is an adequate amount of overhang into the gutter, and that the sheet is square and oriented correctly.
After verifying all of these items, attach the sheet using the approved fastener system. The proper overhang will vary depending upon the type of profile being used, the type of gutter being used, the pitch of the roof, and the specific manufacturer guidelines.
If the overhang is too small, then water can run behind the gutter. Conversely, if the overhang is too large, then both the ability of the gutter to drain properly and the support provided by the gutter will be compromised. Once you have installed several sheets of material on the roof, it becomes significantly more difficult to correct any errors made during installation.
Step 7: Overlap the Sheets Correctly
Side laps are used to create a single continuous weather proof surface by joining two adjacent sheets. To do this, determine which side of each sheet is the overlapping edge and which is the underlapping edge for the type of profile you have.
Then use the appropriate amount of overlap required for your specific profile, ensure that all of the ribs or corrugations will line up with each other when the sheets are joined and finally ensure that once you begin joining the sheets they remain aligned.
For example, Custom Orb typically has a minimum side lap requirement of 1.5 corrugations. Low pitched roofs require additional care with regards to overlapping, flashing and maximum length of roof. Therefore refer to the instructions provided for your profile and pitch.
Step 8: Fix the Sheets with the Correct Fasteners
Use only manufacturer recommended screws that are designed for use with the support material (wood/steel) for both CUSTOM ORB® and TRIMDEK® pierced fix profiles; apply the screws in accordance with the specified locations/patterns; make sure that the screws are installed at a 90 degree angle to the sheet; use only manufacturer approved sealing washers; be careful not to damage the coating during installation.
On many of the LYSAGHT® pierced-fix profiles, crest fixing is preferred for increased weather resistance, however always consult your profiles specific instructions and do not apply wall-cladding methods to roofing. For KLIP-LOK®, attach the clips to the support, position the sheet onto the clips and continue to interlock them.
Do not tighten too much. If you do, you could break washers, distort sheets, damage coatings, and make your seal weaker. Tightening too little will make your product less secure and less resistant to weather conditions.
You need to use the manufacturer’s recommendations for fixing patterns and screw quantities in conjunction with the structural design.
Step 9: Install Flashings, Ridge and Hip Cappings
- Ridge capping covers the top junction where two slopes meet.
- Hip capping covers external junctions between sloping surfaces.
- Barge flashing protects exposed gable edges.
- Apron flashing protects where the roof meets a wall.
Accurately measure the connections; select materials that will work with your profile; maintain the required overlap and water shedding requirements; ensure there is no chance for water to accumulate.
Flashing is one of the most frequent causes of water leakage. Therefore, special attention should be paid to all areas where water may collect (valleys, ridges, wall connections, etc.).
Step 10: Seal Roof Penetrations
Plumbing vents, exhaust fans, skylights, chimneys, flues, air conditioning services and solar panels disrupt the roof surface. Take measurements of each item, select a flashing system that will work with your profile, use purpose built tray, sleeve or flashing assemblies and maintain the required clear distance around chimneys and heat producing equipment.
Silicone should not be used in lieu of a correctly designed flashing system. Fire rated clearances and special flashing arrangements may be required for hot flues.
Step 11: Final Inspection and Clean-Up
Check the sheets’ position, fasteners and washers, side laps, caps, flashings, gutters, downspouts, drain lines, and the sheets themselves for scratches or dents. After checking these areas, remove all metal shavings created during cutting and drilling processes.
If left on the roof, metal shavings will rust, create brown spots on the roof, and possibly damage the protective coatings. To clean the roof properly, use only those methods that are recommended by the manufacturer. Avoid using abrasive materials when cleaning the roof.
Finally, compare your completed installation to the LYSAGHT® Installation Manual and Project Specifications. Also maintain installation records and product documentation for future maintenance and warranty requirements.
Common Mistakes to Avoid
Wrong overlap direction: The incorrect overlap will allow water from wind driven rain to penetrate the joint. You must identify the leading edge of the joint and ensure its orientation is correct prior to making it permanent.
Over- or under-tightened screws: When using too much or too little force when tightening screws, it is important to utilize the correct type of screw; to hold each screw straight up and down (perpendicular); to regulate how far you push each screw into the material, or how much force you apply to turn the screw; and to ensure that the washers on each screw have been flattened out, but have not been damaged.
Over- or under-tightened screws: clear debris regularly, and check valleys and gutters.
Wrong screws or corrosion class: using the wrong type of screws can increase the risk of corrosion, particularly in coastal and/or industrial areas. When two different types of metal are in contact, they may undergo galvanic corrosion. Use screws that meet the requirements of AS 3566, have an appropriate level of resistance to corrosion, and if required use EPDM washers.
Not accounting for thermal movement: Metal expands and contracts with changes in temperature. Adhere to the manufacturer’s recommendations regarding the maximum recommended length of each sheet, use approved concealed fixing clips as recommended, and do not use additional restraint devices.
Skipping sarking or insulation: Skipping insulation/sarking can impact how well you manage condensation, how comfortable you will be in your home, and how well it performs. Always follow the National Construction Code (NCC) as well as the manufacturer’s recommendations.
Pro Tip: Create a quality control checklist prior to starting that includes: alignment, screw placement, flashings, material compatibility, thermal expansion/contraction and debris clean-up.
How Long Does It Take and What Does It Cost?
Cost and time vary depending on the area of the roof, the complexity of the project, the type of existing roof materials, the amount of labor needed to complete the work, how accessible the site is, and what kind of design you choose. A relatively simple job (single story) would typically require 2-3 working days. A complex replacement job could easily require at least one week
| Roof size | Typical time |
|---|---|
| Up to 150 m² | 1-3 working days |
| 150-220 m² | 2-4 working days |
| 220-320 m² | 3-5 working days |
| Above 320 m² | 5-7+ working days |
The following are rough approximations of time frames based on the assumptions that there is a reasonable amount of access to the site, the crew has a history of completing projects within these time frames, and there will be no significant structural repairs needed.
Other variables such as weather, topography, penetrations through the roof, removal of the previous roof and installation of scaffolding may alter the approximate time frame.
Indicative Costs in Australia (2026, including GST)
| Project type | Indicative installed cost |
|---|---|
| New Colourbond roof | AUD 65-110/m² |
| Existing metal roof replacement | AUD 85-140/m² |
| Tile-to-Colourbond conversion | AUD 100-170/m² |
| Asbestos roof replacement | AUD 140-250/m² |
In terms of cost per square meter of roof space (200m²), this would equate to approximately $13,000-$22,000 for a completely new install; $17,000-$28,000 for a metal roof replacement; and $20,000-$34,000 for a tile conversion. Please note these figures represent indicative costs based on average market rates and do not reflect BlueScope pricing nor a quote specific to your location.
Costs are determined by the profile, thickness and finish of the material used, labor required, complexity of the installation, removal and disposal of waste (with asbestos requiring specialized removal and separate assessment), installation of fascia, gutters and downpipes, access, height and scaffolding requirements, and application of sarking and insulation. When receiving estimates from contractors, make sure to ask for an estimate which is broken down into individual items so that you may compare prices of similar items.
Australian Standards and Compliance
Installation must be in accordance with the applicable building code, structural design criteria, relevant standard(s) and manufacturer’s instructions. The primary reference is AS 1562.1:2018 (Design and Installation of Metal Roof and Wall Cladding; Part 1: Metal). This standard provides guidance on materials, structural design and load testing, wind effects, thermal-induced movement, and installation performance. Additional references may also apply.
AS 3566 series: self-drilling screws for building and construction
AS/NZS 1170.2: wind actions for structural design
National Construction Code (NCC): building and construction requirements
Installation manual and BlueScope technical bulletin for LYSAGHT® profiles: compatibility, maintenance and warranty information.
Check the applicable NCC edition and state variations before you begin.
Colourbond Warranty
In order to be eligible for the product warranties offered by BlueScope, the products must be used in accordance with their designated application. The warranty will typically cover corrosion perforation and/or paint flaking/peeling.
However, there are numerous variables that determine the warranty period and terms of coverage including; product type, geographic location and level of exposure.
Factors that could invalidate your eligibility include; using inappropriate fastners, damage to the protective coating, using the products beyond their intended application, connecting incompatible metal parts together, or failing to properly maintain the products.
Are you sure that an improper installation will automatically negate your warranty? There is no “yes” or “no” answer. Your warranty depends on how much coverage you purchased, what caused the issue, what is excluded from the warranty, and whether the installation was done properly.
It’s possible that an installation issue will not be covered by your product warranty. In order to help prevent problems with your warranty, you should check to see if the product you purchased will work well in the climate/environment where it will be installed.
You should also make sure to use BlueScope and LYSAGHT® approved products/accessories and install them according to their guidelines. Finally, you should save all of the invoices and documentation related to the installation of your product.
According to BlueScope, you may apply for a warranty claim using BlueScope’s Warranty Management System, which usually occurs within 12 months after the installation of your product.
Maintenance After Installation
Clean out all the gutters and downspouts: take out the leaves, look for any clogs and clear off the valleys. If your gutters are clogged they will spill over and make your house wet.
Inspect at least yearly: Inspect at least annually, and following significant weather events, examine the roof to find loose fasteners, rusty areas, damaged flashing, leaks and general deterioration around skylights. Examine from a safe position on the ground, or employ a professional roofer to inspect for you.
Wash as needed: Rain generally keeps most exterior surfaces free of debris. BlueScope suggests using a hose to wash areas that have not been washed by rain at least twice per year (and perhaps even more frequently if you live near the ocean). When washing, use clean water, mild dishwashing soap, and a soft cloth/sponge. Never use abrasive scouring pads.
Wash when required: Be extra careful when choosing a product for use around the coast: select one that can withstand marine conditions and ensure all fasteners are resistant to corrosion.
Take extra care near the coast: As far as the duration of a Colourbond roof, there is no one set time frame. The longevity of a Colourbond roof is dependent upon how well it was installed, the amount of exposure to the elements, how regularly the roof has been maintained and what type of product was chosen for the roof. A warranty period is not necessarily indicative of the expected life span of the roof.
Frequently Asked Questions
Can I install a Colourbond roof myself?
Lorem ipsum dolor sit amet, consectetur adipiscing elit. Ut elit tellus, luctus nec ullamcorper mattis, pulvinar dapibus leo.
How many days does it take to install a Colourbond roof?
The average time for a roof to be installed on a home is approximately one to three days, if the roof has an area of less than 150 square meters. If the roof has an area between 150 and 220 square meters, then it typically takes two to four days. For larger or more complicated roofs, the installation process can last anywhere from one week to longer.
What is the minimum roof pitch for Colourbond roofing?
It’s based upon the type of profile. Custom Orb generally requires 5 degrees, Trimdek can take 2 degrees and some Klip-Lok products will accept 1 degree. Check your base metal thickness and the latest installation manual.
How much should Colourbond sheets overlap?
The requirement for the side overlap of the CUSTOM ORB® profile is dependent upon the type of profile used; however, most profiles have different methods of interlocking. Manufacturers’ instructions regarding installation should be followed, particularly when installing over low-pitched roofs and in highly exposed locations.
What screws should I use for a Colourbond roof?
Use manufacturer-recommended screws that are designed to work with your specific profiles and supports, adhere to AS 3566, have an appropriate level of corrosion protection based upon the environmental conditions, and employ EPDM sealing washers as per specifications, while adhering to the guidelines regarding screw length, coating and placement.
Can Colourbond be installed over an existing roof?
An properly designed system may allow this to happen, however it is unlikely to work on all types of buildings. Prior to determining whether to proceed with this option, you need to determine if your building has the appropriate type of structure; if your roof is in good condition; if there are any additional loads that will be placed on the roof; if there is adequate ventilation in the building; if there is a problem with condensation in the building; and if there are approvals that need to be obtained. Do not apply a new layer of roofing over damaged roofing material or roofing materials that contain asbestos unless an assessment has been conducted by a professional.
How many years does a Colourbond roof last?
The useful life of a properly chosen, installed, and well-maintained roof will vary from 20 to 50 years; however, the actual length of time that a roof remains effective is determined by how much exposure it receives, the quality of its installation and how often it is maintained. Warranties on roofs do not guarantee that the roof will last for the period of the warranty.
Conclusion: Install Your Colourbond Roof the Right Way
The installation of a Colourbond roof involves much more than simply attaching the metal sheet to the structure. To achieve maximum durability from the Colourbond roof system, it requires proper structural preparation, selection of the appropriate profile, use of adequate fastners, adequate drainage systems, and precise installation of flashings. By adhering to manufacturer’s specifications and Australian standards, you can reduce the risk of leakage, corrosion and expensive repair costs.
Key takeaways
Choose the correct profile: Match CUSTOM ORB®, TRIMDEK® or KLIP-LOK® to your pitch, design and project requirements.
Follow correct practice: Pay attention to the following when working on a roof: laps, fasteners, thermal movement, flashings, and weatherproofing.
Prioritise safety and maintenance: Prioritize safety and maintain your roof: use appropriate fall protection, check it periodically, and keep your gutters free of debris.
Planning a Colourbond roofing project? Get an expert’s opinion prior to ordering materials and beginning installation. A comprehensive quotation will provide details of how much material is required, labor costs involved, disposal of existing roof materials, and the correct profile for your home. You can request a free Colourbond roofing quote now, or you can use a roofing material estimator to determine how many sheets of metal you will need, fasteners, flashing, and accessory items.